
We’ve all been there: you find a foundation that looks perfect in the bottle, but by midday, it has settled into fine lines or started clinging to dry patches. What if the secret to unlocking its true potential—and achieving a truly radiant, skin-like finish—was already sitting in your skin care cabinet?
We’re talking about the professional technique of mixing a drop of facial oil directly into your foundation. This guide moves beyond the simple “hack.” We’ll dive into the art and science of this beautiful method, showing you exactly how to choose the right partners, master the perfect ratio, and troubleshoot like an expert. The goal is to create a radiant, second-skin finish that feels as comfortable as it looks.
Why This Technique Elevates Your Foundation
Adding a single drop of oil may seem small, but it fundamentally changes the way your foundation interacts with your skin. This technique isn’t just about adding a glow; it’s about transforming the texture, finish, and feel of your makeup.
- It Creates Sheer Hydration: That medium-to-full coverage foundation in your drawer is instantly transformed. The oil sheers it out slightly, turning it into a hydrating, luminous tint that evens out your skin tone without masking it.
- It Achieves a Seamless Melt: This is the secret to avoiding that “makeup” look. The oil helps the foundation pigments merge beautifully with your skin, becoming one with it. This significantly minimizes caking and settling, especially around the nose and mouth.
- It Provides All-Day Comfort: For those with dry or mature skin, this technique is a game-changer. The oil provides a continuous cushion of moisture, making your foundation feel flexible and comfortable from morning to night, rather than tight or dry.
- It Makes Your Makeup More Skin-Supportive: By blending a drop of high-quality facial oil into your foundation, you’re infusing it with nourishing botanicals and protective lipids. It turns your makeup into one more opportunity to support your skin’s health and barrier.
The Pro’s Guide: A Step-by-Step Method

Now that you understand the benefits, let’s move into the beautiful “how.” This is a simple ritual, but each step is crucial for achieving a seamless, second-skin finish.
Step 1: Create a Hydrated Canvas
Let’s begin with a non-negotiable truth: while this technique adds moisture to your makeup, it does not replace your primary moisturizing step. Starting with plump, hydrated skin is essential for a smooth application. This is best achieved by applying a high-quality, botanical Moisturizer first and allowing it to fully absorb.
Step 2: Find the Perfect Pair
The success of this technique hinges on compatibility between your oil and foundation.
- The Simple Science: Oil mixes best with oil-based and silicone-based foundations. Water-based formulas, on the other hand, can sometimes separate or curdle when mixed with oil, just like oil and vinegar.
- The 10-Second Compatibility Test: Before applying to your face, perform this simple test. On the back of your hand, dispense a little foundation and a single drop of oil side-by-side. As you begin to mix them, watch the texture closely. Does it become a smooth, unified emulsion? Or does it look slightly separated? This quick check will tell you everything you need to know.
- Choosing Your Oil: The texture of your oil also matters. For a cushioned, nourishing feel that plumps the look of fine lines, an antioxidant-rich formula like the Anti-Aging Facial Oil is ideal. For a more vibrant, luminous quality that enhances radiance, choose an oil with brightening botanicals, like the Rejuvenating Facial Oil.
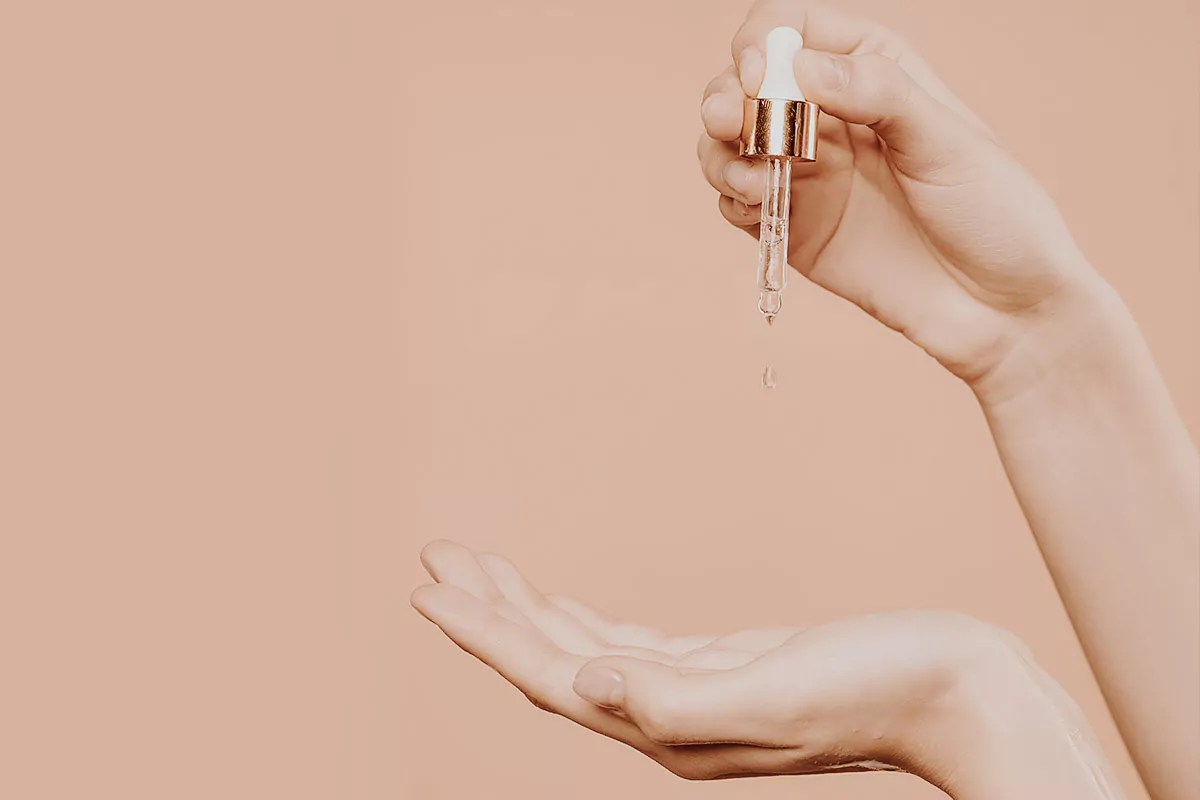
Step 3: Master the Golden Ratio (The 1-Drop Rule)
The goal is to enhance your foundation, not deconstruct it. The ratio is critical, and less is always more.
- The Method: Dispense your usual amount of foundation onto the back of your hand or a palette. Add one single drop of your chosen facial oil. Using a clean finger or a brush, mix them together thoroughly until the color and texture are completely uniform.
Step 4: The Art of Application
Your application tool has a huge impact on the final look.
- For the most natural finish: Use your fingers. The warmth from your hands helps the product melt into the skin, creating a true skin-like effect.
- For an ultra-dewy look: Use a damp beauty sponge. This will sheer out the coverage even more, resulting in a beautifully translucent, dewy finish.
- For a polished finish: Use a foundation brush. This provides a more controlled, blended application for a polished look.
Troubleshooting Guide: Turn Fails into Flawless Finishes

Even with the best technique, you might need to make small adjustments. Think of this guide as your expert cheat sheet for turning any potential fail into a flawless finish.
If your face looks more greasy than glowy…
This almost always means the ratio was off (you used a little too much oil), or your skin is naturally on the oilier side. But don’t panic, and don’t remove your makeup. Simply take a clean tissue and gently blot your entire face to lift away excess surface oil. Then, using a large, fluffy brush, apply a minimal amount of translucent powder only to your t-zone (forehead, nose, and chin), preserving the beautiful glow on your cheeks and high points.
If your foundation seems to disappear by lunchtime…
Remember that adding oil will naturally sheer out the formula and can slightly reduce its wear time, especially if you touch your face often. The solution is simple: after you’ve finished your entire makeup application, a setting spray is your best friend. A few light mists will help lock everything in place. For very important events, you could also apply your oil-foundation mixture only to the high points of your face and use your regular foundation everywhere else.
If your foundation looks patchy or separated on the skin…
This points to one of two culprits: either your foundation and oil are not compatible, or your base skin care hadn’t fully absorbed before you started. First, revisit the 10-second compatibility test. If you’ve confirmed they mix well, the issue is likely absorption time. Always give your moisturizer and sunscreen at least 5 full minutes to set before applying any makeup on top.
Makeup Infused with Skin Care
This technique is so much more than a simple trick; it’s an intentional way to customize your foundation, ensuring it looks like your best skin, not just something sitting on top of it.
Embrace this method to take control of your makeup, making it work for your skin’s unique needs day by day. This small step transforms foundation from a potential mask into a true extension of your skin care ritual. It’s a philosophy of synergy and nourishment that guides the creation of our entire Facial Oils collection.
Frequently Asked Questions
Can I do this with oily or combination skin?
Yes, with the right technique. The key is moderation. Use just a half-drop of a very lightweight, balancing oil. When you apply the mixture, start from the outer parts of your face (cheeks, jawline) and blend inwards, using only what’s left on your brush or sponge for your t-zone.
Does this work with concealers?
It’s an excellent technique for under-eye concealers. Mix a pin-head amount of oil with your concealer to add a boost of hydration and help prevent creasing in that delicate area. However, do note that this can make your concealer slightly thinner in consistency, reducing its coverage a little.
Where does sunscreen fit into this routine?
Sunscreen is always the final step of your skin care. This is a non-negotiable rule to ensure its protective qualities work as intended. Apply your sunscreen, wait for it to fully set (at least 3-5 minutes), and then apply your foundation-oil mixture on top.


Leave a Reply